
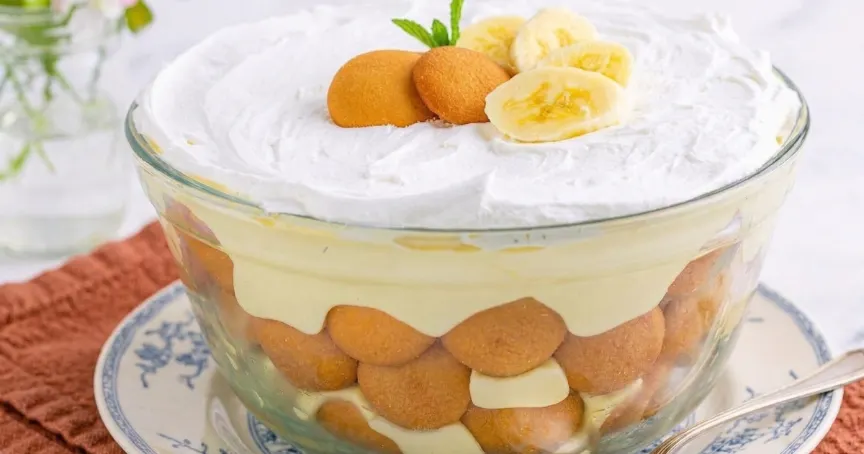
If there’s one dessert that always disappears first at family gatherings, it’s banana pudding. This is the kind of recipe moms passed around at church potlucks, summer barbecues and holiday dinners. It’s creamy, sweet, simple to make and honestly feels like comfort in a bowl. No cooking, no stress, just layers of pudding, bananas and cookies that turn soft and dreamy after chilling in the fridge.
This recipe makes a big dish perfect for sharing, and it’s one of those desserts you can count on every single time.
Yield: 12 servings
Prep Time: 25 minutes
Chill Time: 1 to 2 hours
Total Time: About 25 minutes plus chilling
Ingredients You’ll Need
Pudding Mixture
- 8 ounce block cream cheese, softened completely to room temperature
- 1 (14 ounce) can sweetened condensed milk
- 1 (5 ounce) box instant vanilla pudding mix (make sure it says INSTANT)
- 3 cups milk (2% or whole milk works best)
- 2 teaspoons vanilla extract
For Layering
- 1 (8 ounce) tub whipped topping (Cool Whip), thawed and divided
- 1 (11 ounce) box Nilla wafers, divided
- 5 to 7 ripe bananas, sliced
Equipment
- Large mixing bowl
- Electric hand mixer or stand mixer
- Rubber spatula
- Trifle bowl, large serving bowl or 9×13 inch baking dish
- Plastic wrap
Before you start, make sure the cream cheese is truly soft. This step matters more than people think. Cold cream cheese equals lumpy pudding, and nobody wants that.
Step by Step Instructions
Step 1: Beat the cream cheese
Place the softened cream cheese into a large bowl. Using an electric mixer, beat on medium speed until smooth and fluffy. Take your time here. You want it creamy with no chunks hiding in the bowl.
Step 2: Add the pudding ingredients
Add the sweetened condensed milk, instant vanilla pudding mix, milk and vanilla extract.
Step 3: Mix everything together
Start mixing on low speed so the milk doesn’t splash everywhere. Then increase to medium speed and continue mixing for a few minutes. Scrape down the sides and bottom of the bowl because cream cheese likes to stick there. The mixture will look thin at first but will slowly thicken and smooth out.
If you see small lumps, keep mixing. Most of them will disappear as the pudding thickens.
Step 4: Fold in whipped topping
Gently stir in half of the whipped topping. This makes the pudding light, creamy and extra fluffy.
Step 5: Start layering
Place one third of the Nilla wafers on the bottom of your dish. If you’re using a clear bowl, you can stand some cookies along the sides for that classic layered look.
Step 6: Add bananas
Add a layer of sliced bananas over the cookies. Don’t be shy here. A good banana pudding should have bananas in almost every bite.
Step 7: Add pudding layer
Spread one third of the pudding mixture over the bananas, making sure they are completely covered.
Step 8: Repeat the layers
Add another layer of wafers, another layer of bananas and another layer of pudding. Repeat one more time. The final layer should always be pudding.
Step 9: Top it off
Spread the remaining whipped topping evenly across the top. Smooth it out gently.
Step 10: Chill the pudding
Cover the dish with plastic wrap and refrigerate for at least 1 to 2 hours. This is when the magic happens. The wafers soften, the flavors blend together and the pudding sets perfectly.
Step 11: Serve and enjoy
Serve cold with a big spoon. This dessert is meant for sharing and going back for seconds.
Extra Success Tips
- Always check that your pudding mix says instant, not cook and serve.
- Double check you grabbed sweetened condensed milk instead of evaporated milk.
- Use ripe yellow bananas with a few brown speckles for the best flavor.
- Let the pudding chill long enough so the wafers soften into that classic cake like texture.
Storage Tip
Store leftovers covered in the refrigerator for up to 3 days. Freezing is not recommended because the texture changes once thawed.
Nutrition Information (Approximate Per Serving)
Calories: 458 kcal
Total Fat: 14 g
Saturated Fat: 9 g
Carbohydrates: 72 g
Fiber: 1 g
Protein: 10 g
Sodium: 408 mg
Disclaimer: Nutrition facts are estimated using online tools and may vary based on your ingredients and preparation. Please consult a nutritionist for precise dietary advice.
Helpful Mom Tips and Frequently Asked Questions
What is banana pudding?
Banana pudding is a classic Southern dessert made with layers of vanilla pudding, bananas, cookies and whipped topping. It’s served cold and shows up at just about every gathering because everyone loves it.
Why choose a no cook version?
Cooked pudding tastes great, but bananas brown faster in warm custard. This no cook version keeps bananas looking fresh longer, which makes it perfect for potlucks and travel.
Can I use banana flavored pudding?
Yes, you can. Some people love extra banana flavor while others prefer classic vanilla. Use whatever your family enjoys.
Can I make homemade whipped cream instead of Cool Whip?
Absolutely. Just remember homemade whipped cream softens faster, so the pudding is best eaten the same day.
Do I have to use Nilla wafers?
You can use other cookies, but Nilla wafers give that nostalgic flavor everyone remembers.
How do I keep bananas from turning brown?
Lightly brush sliced bananas with lemon or orange juice. Just a tiny amount helps slow browning without changing the taste.
How long does banana pudding last?
Up to three days in the refrigerator if covered well. Once serving begins, bananas naturally start to darken, which is completely normal.
This is one of those recipes that feels like home. Simple ingredients, easy steps and a dessert that always brings people back to the table for one more spoonful.